
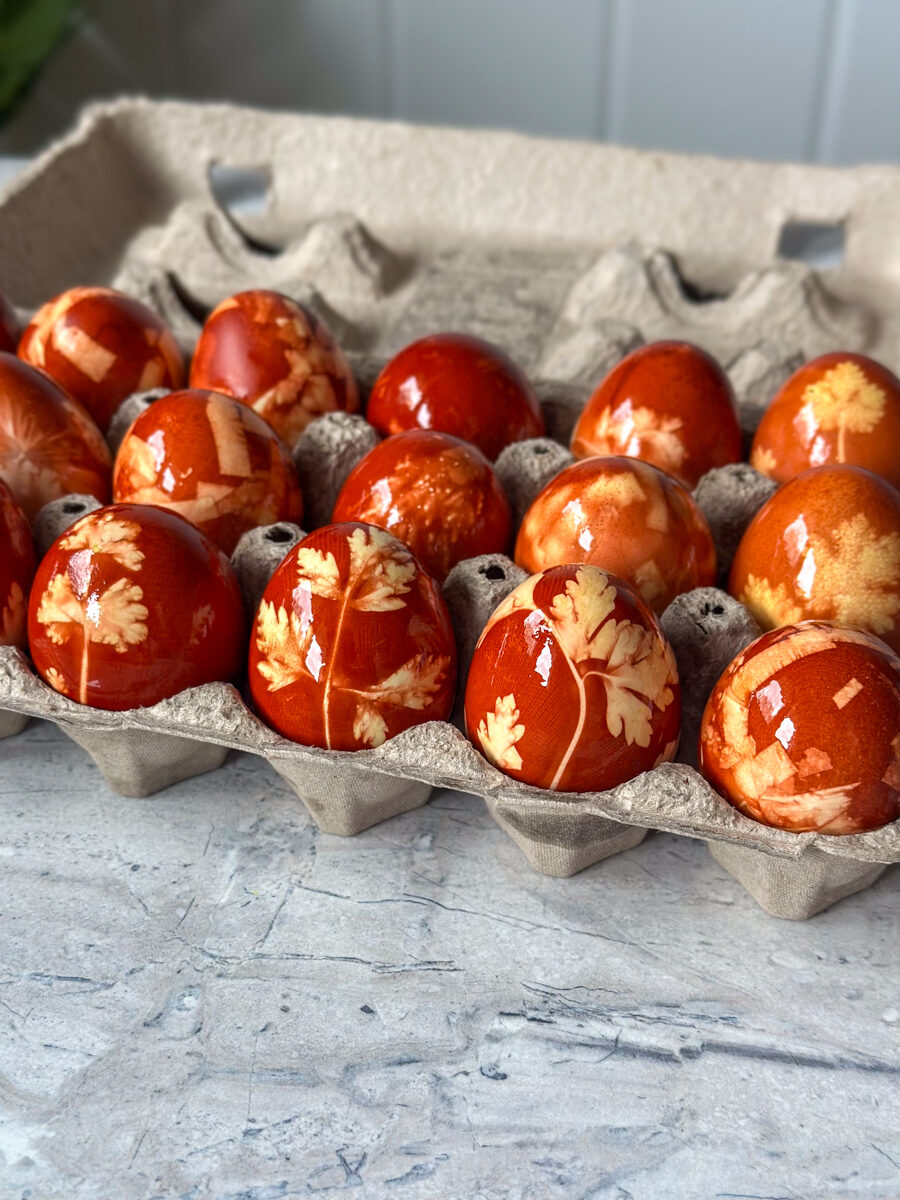
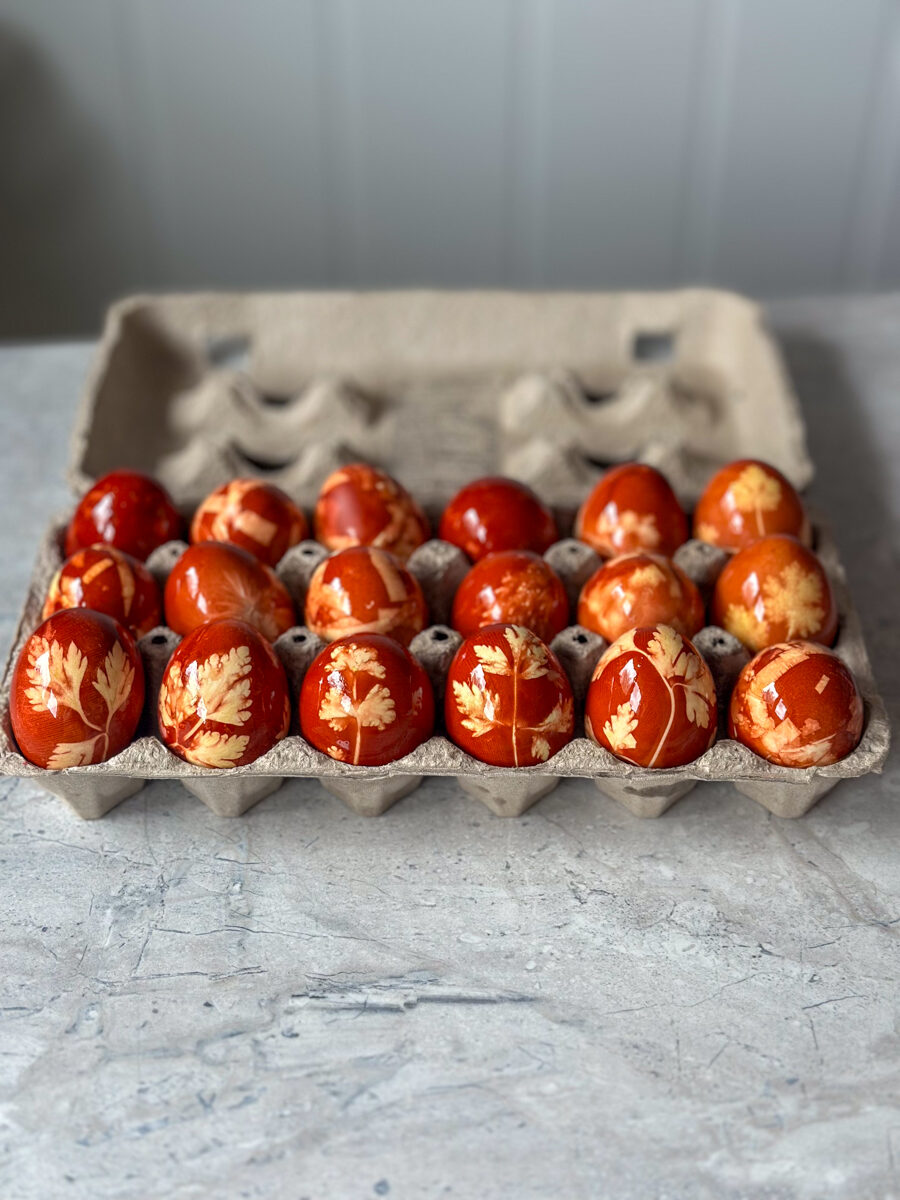
Need a creative twist on easter egg decorations this year? Want to reduce food waste? Here's how dyeing eggs with onion skins is done! Passed down through generations in my family, it’s a beautiful way to celebrate Easter—completely natural, waste-free, and rooted in tradition!
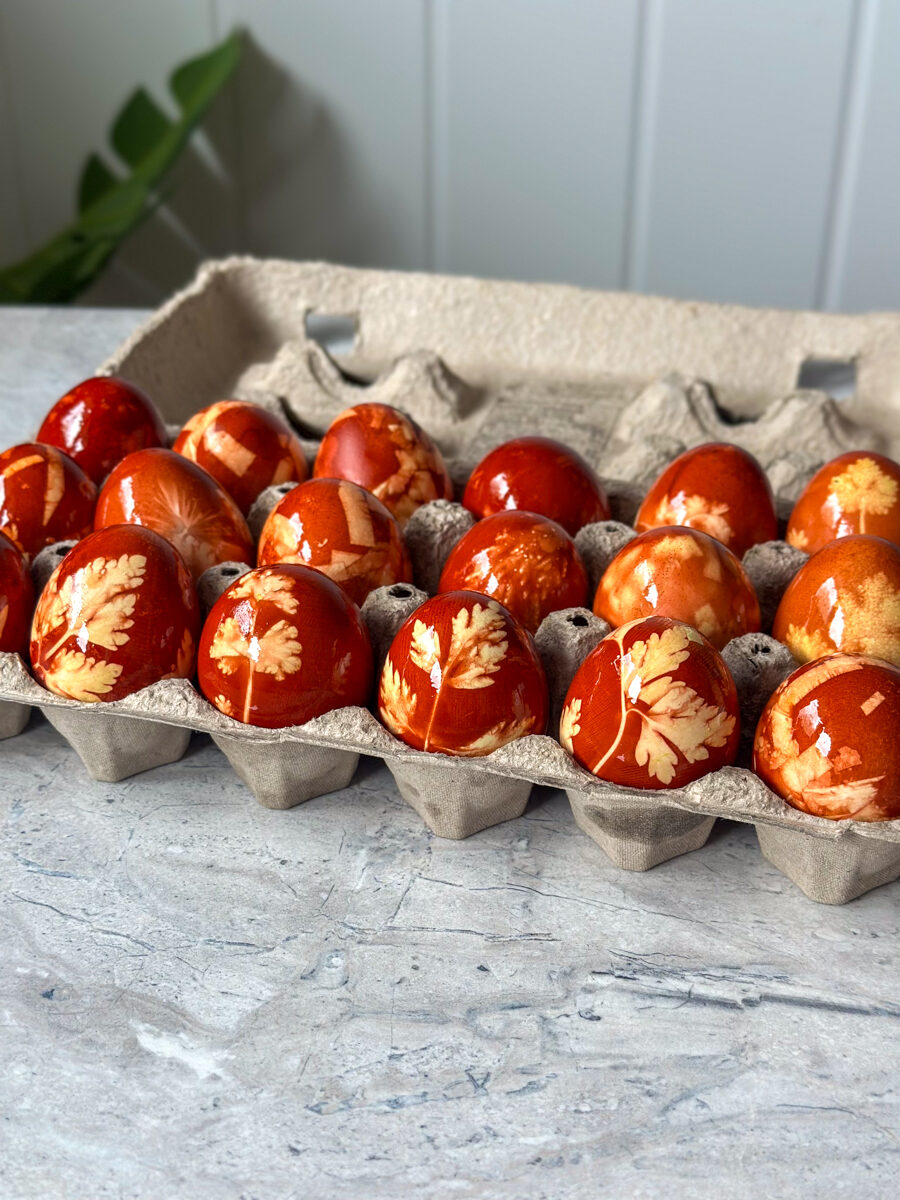
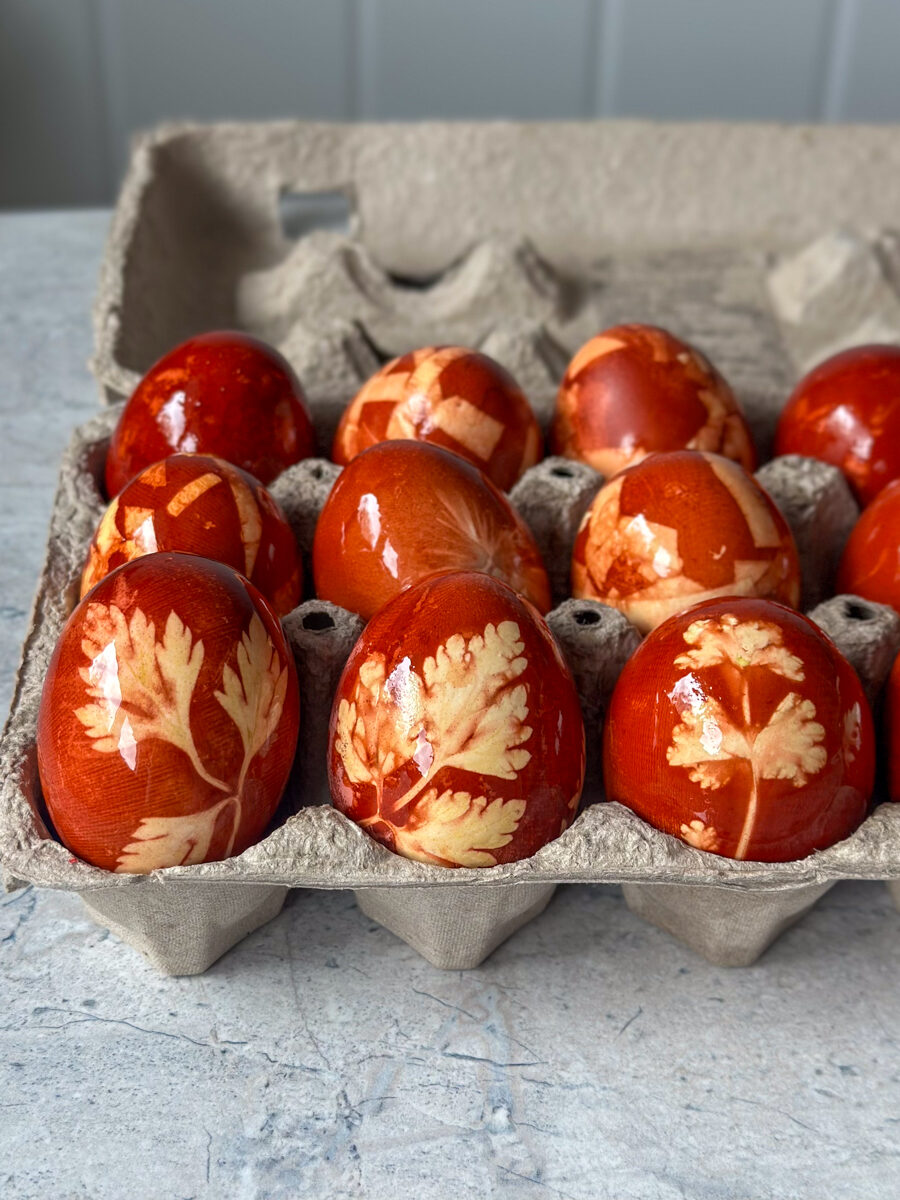
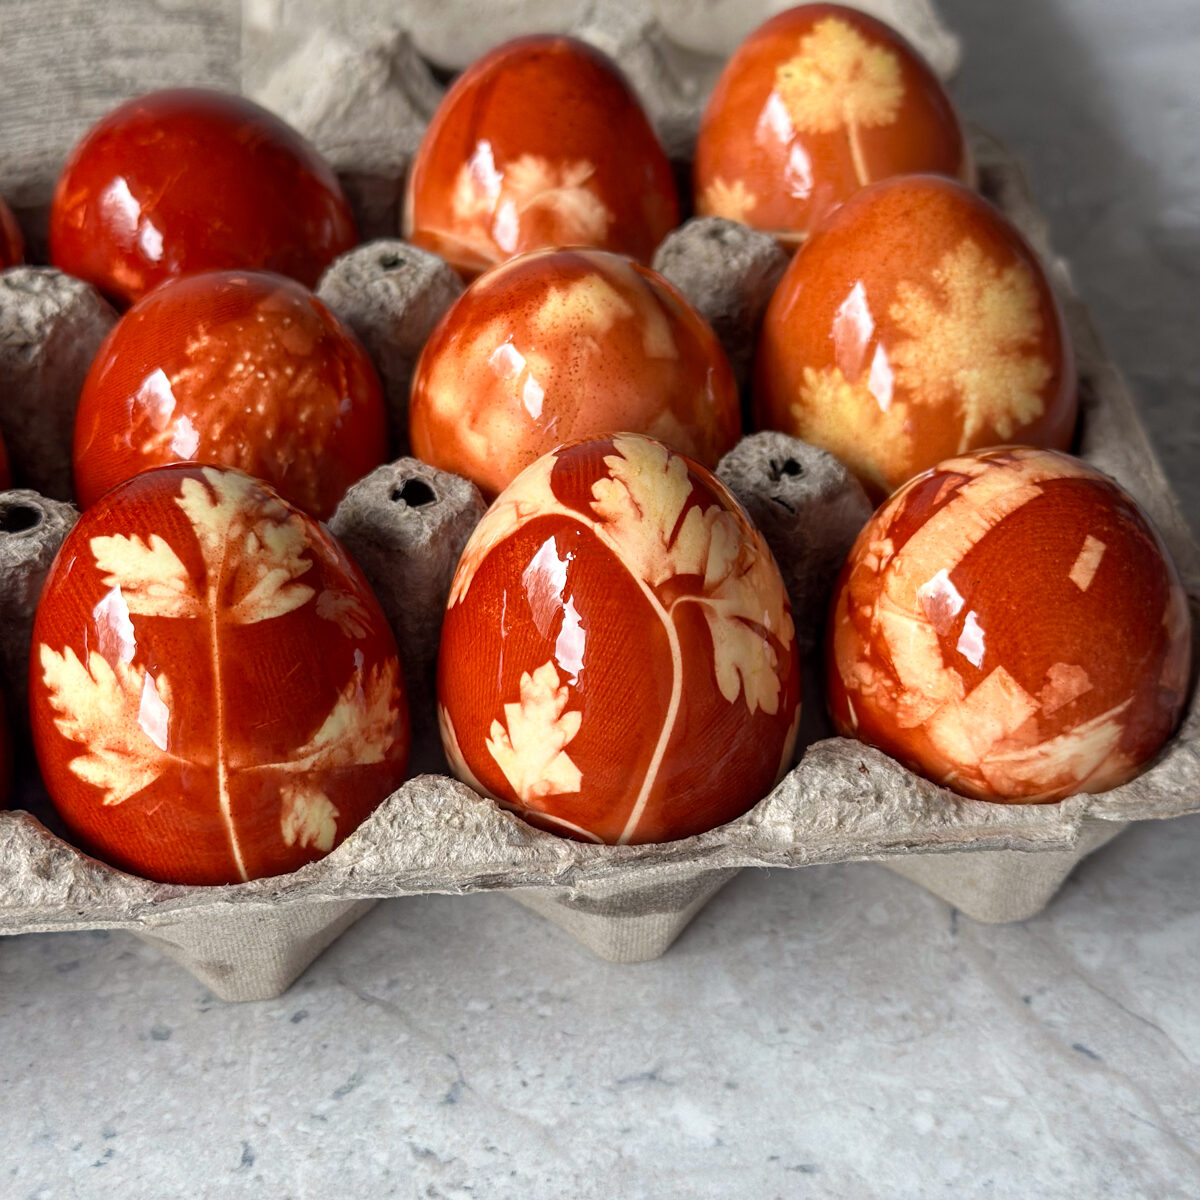
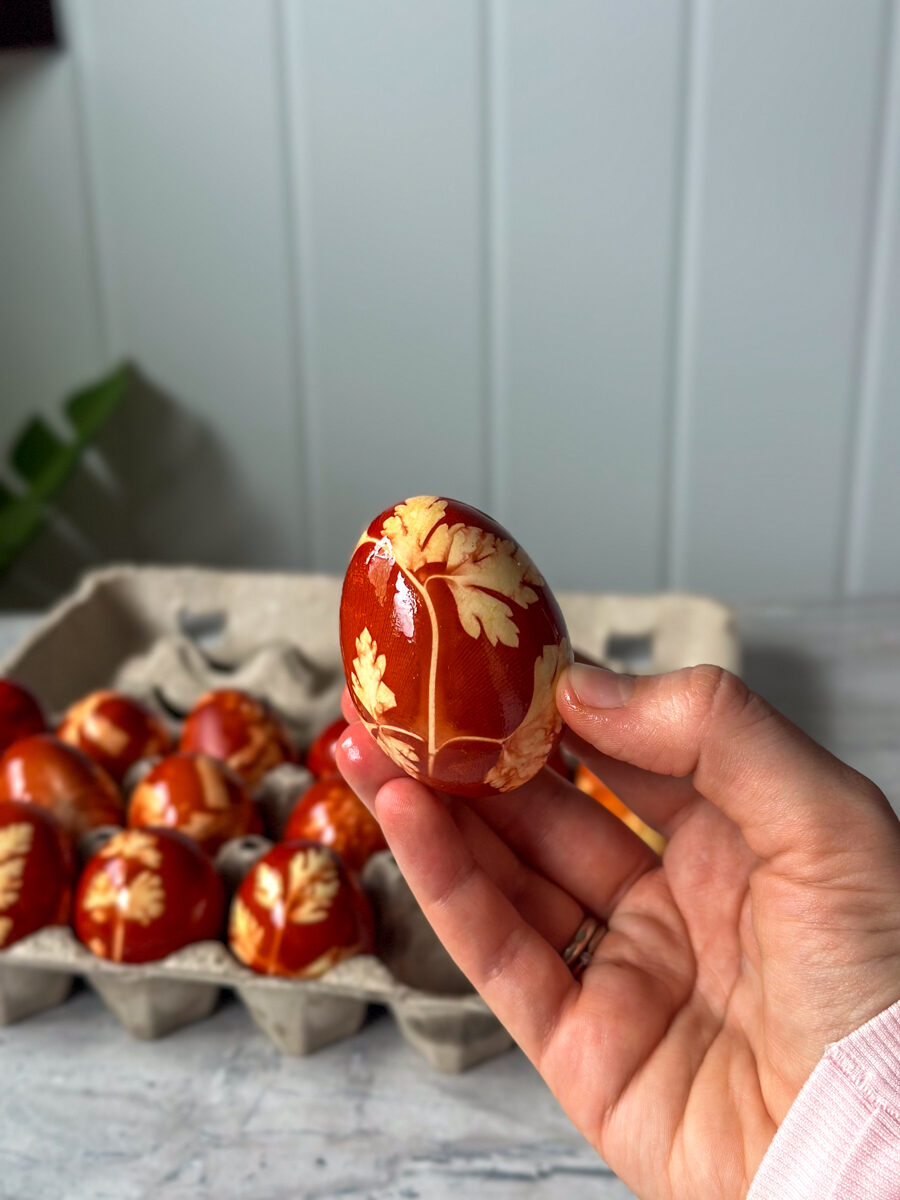
Instead of tossing onion skins, we use them to create rich, earthy tones on eggs, paired with herbs for delicate imprints. Each egg becomes a tiny canvas of natural marbling and botanical prints, like nature’s own artwork.
BTW, if you need more Easter Dessert inspiration... you'll love these: Easter Cookies, Easy Oreo Cheesecake & this Easy Fudgy Oreo Brownie Recipe!
Jump to:
Ingredients
- White Eggs
- Onion Skins (Yellow And Red)
- White Vinegar
- Fresh Herbs (Parsley, Clover, Dill)
- Nylon Stocking
See recipe card for quantities.
Instructions (VIDEO)
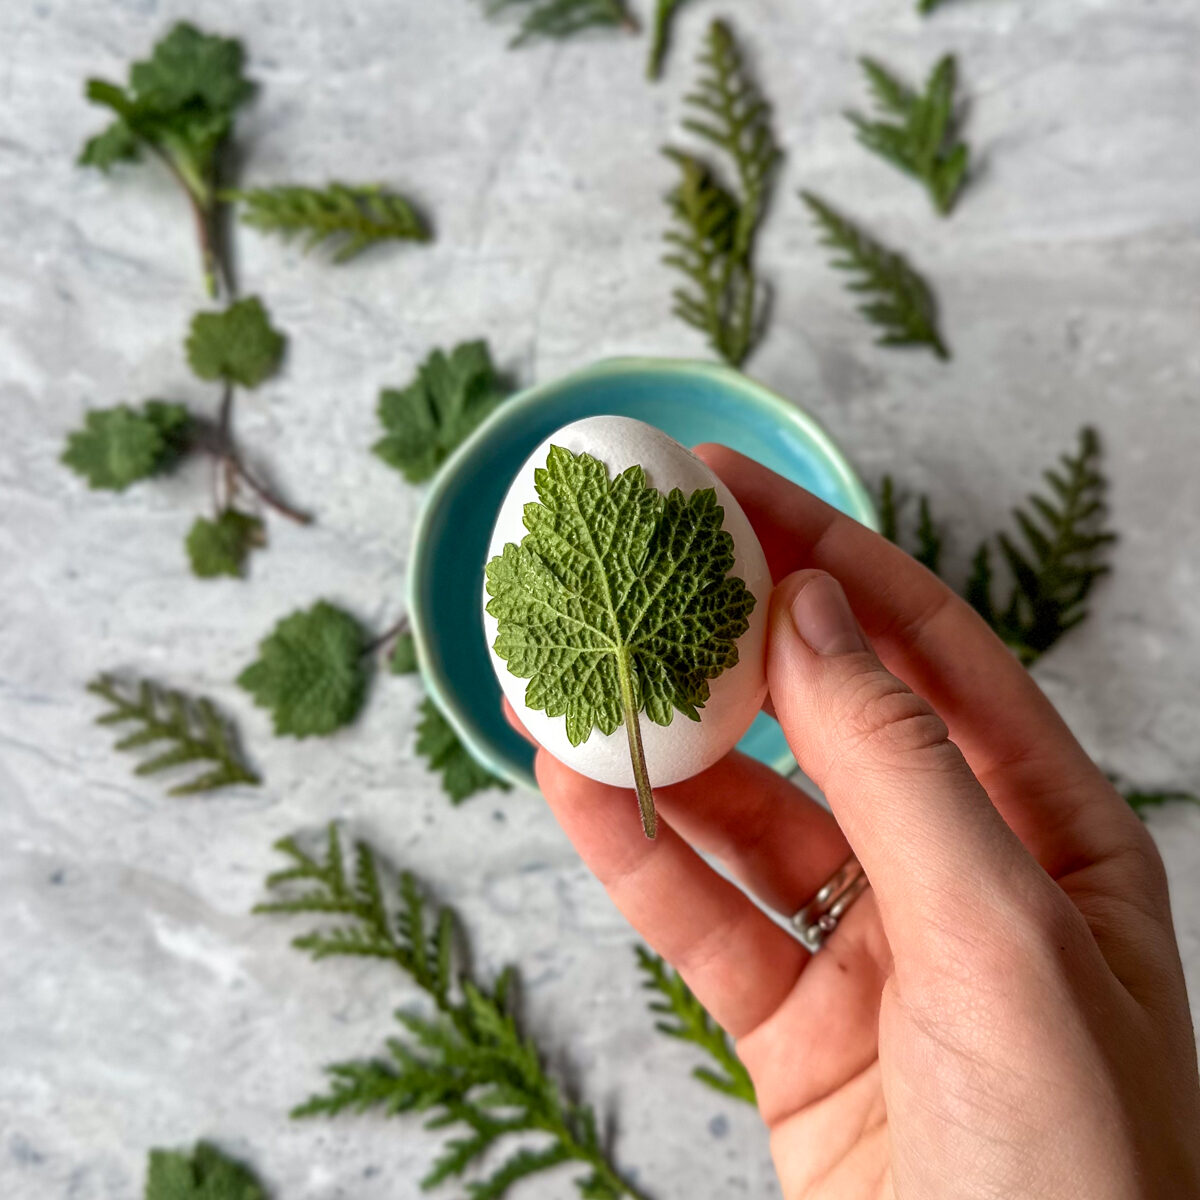
Using water, stick a leaf or (like parsley) onto each egg.
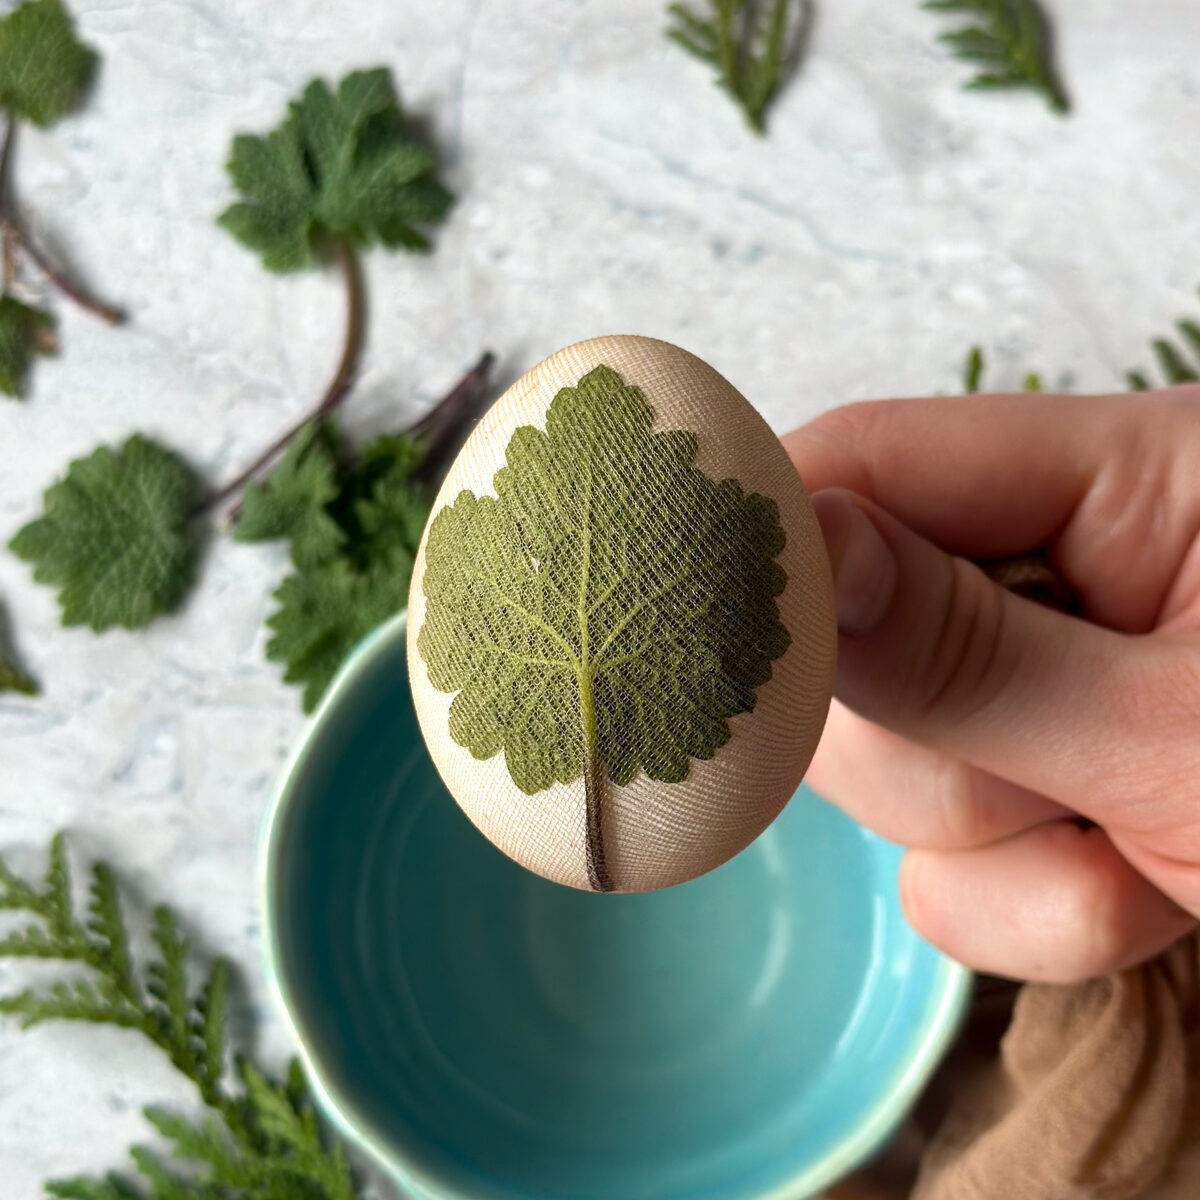
Than Place the egg into a piece of stocking, pull tight, and tie a knot.
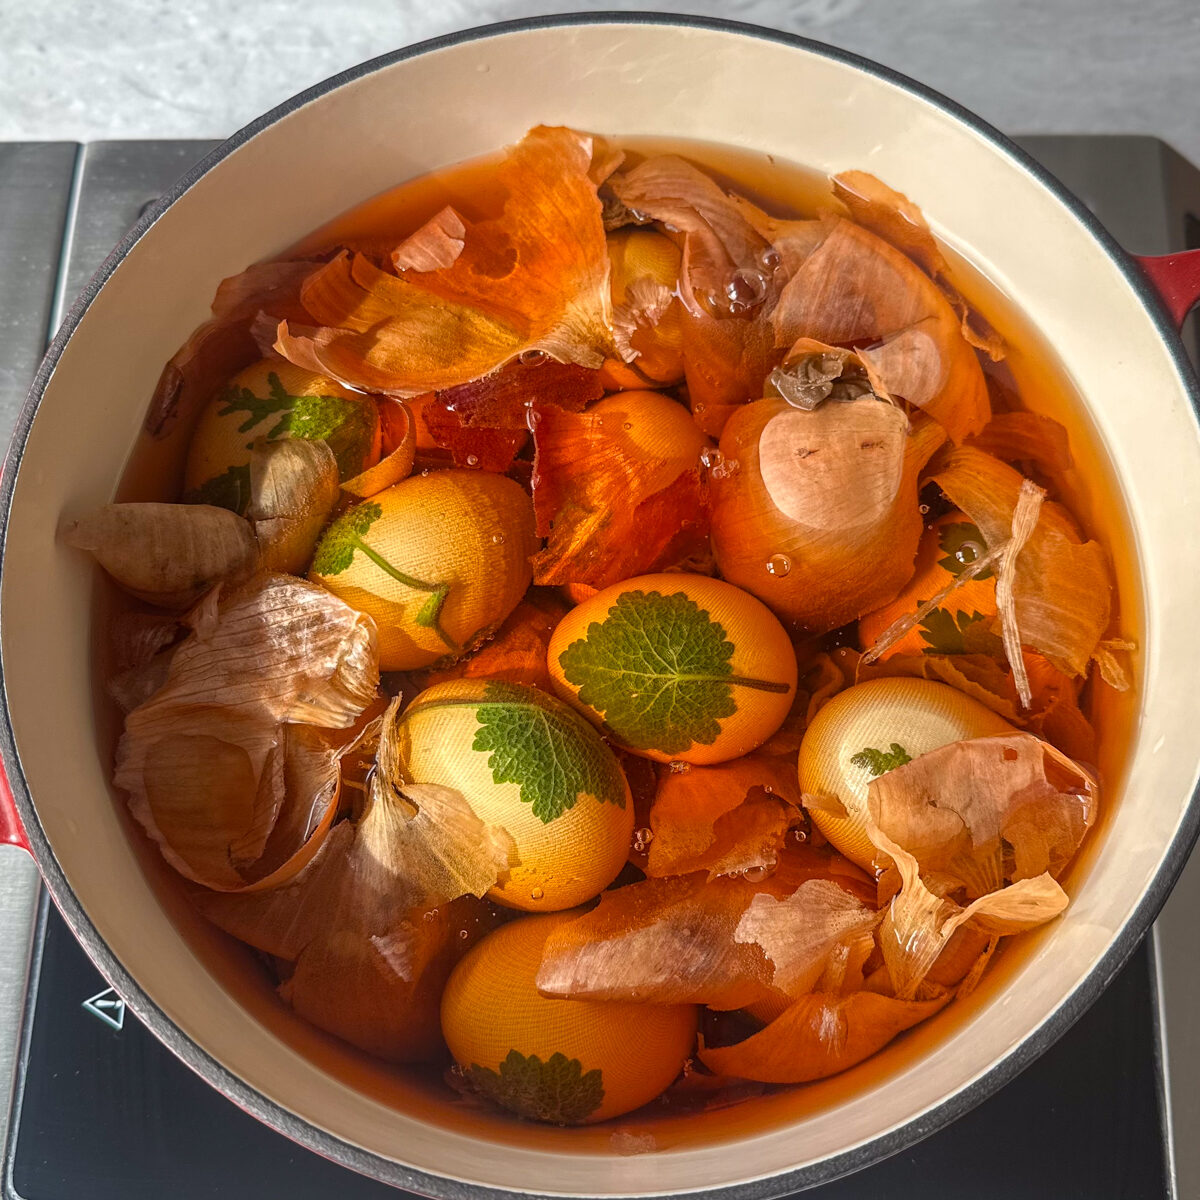
Arrange all the eggs in a pot with the onion skins, salt, water & vinegar!
Take the eggs out of the dye, let them cool slightly, cut off the stocking, and remove the herbs.
- Wash the eggs thoroughly. Lightly press a herb or leaf onto each egg—water helps it stick.
- Place each egg into a cut piece of stocking, pull it tight so the herb stays in place, and secure with a knot or thread.
- Line a large pot with onion skins and place the wrapped eggs on top. Add enough water to fully cover the eggs, then stir in the vinegar.
- Bring to a boil, then lower the heat and simmer for 10 minutes. Remove from heat, cover, and let the eggs sit in the dye for another 30 minutes.
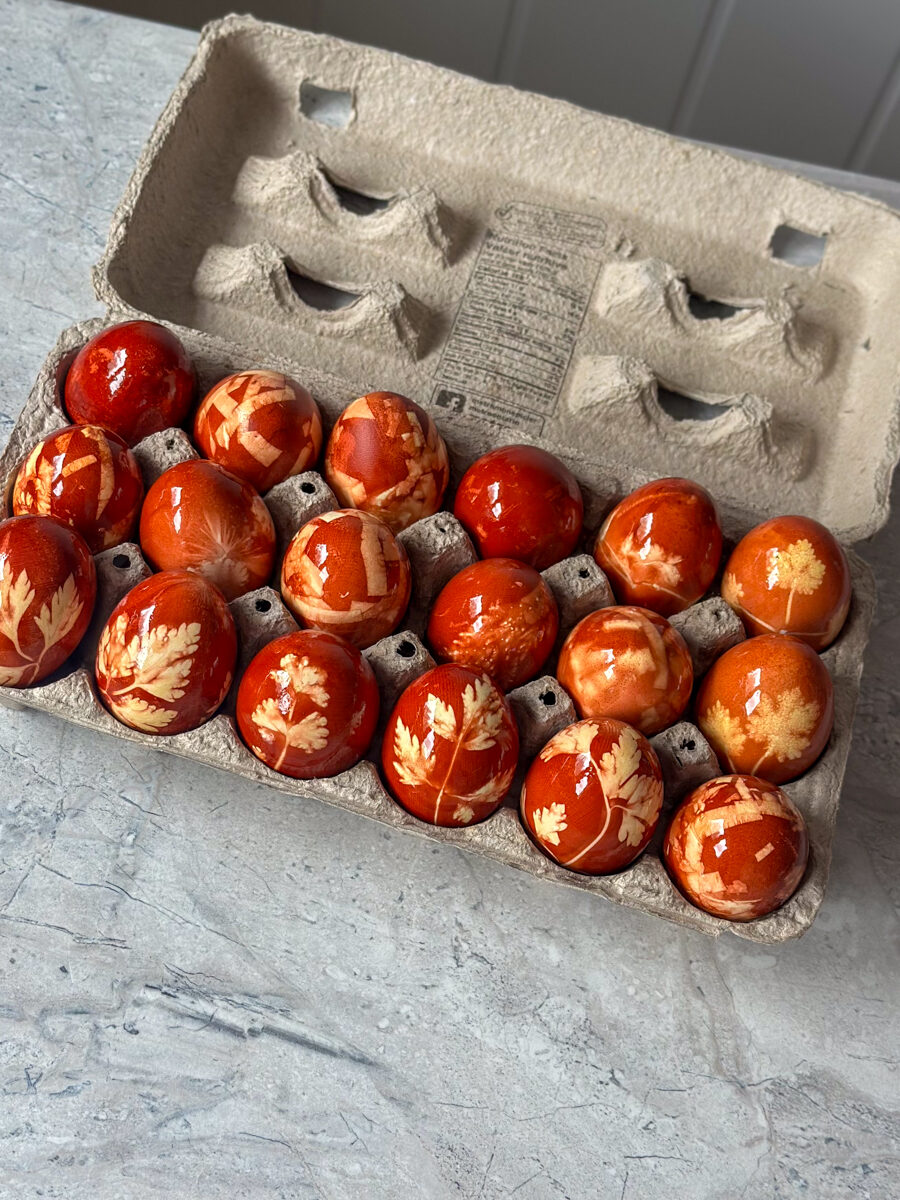
- Let the eggs cool slightly. Cut away the stocking, peel off the herbs, and gently rub each egg with a little oil to enhance the color and give them a natural shine!
Scroll all the way down for the full recipe card!
Substitutions
- White Eggs: Brown eggs (though the colors may vary slightly)
- Onion Skins: Red cabbage (for a purple hue) or beetroot skins (for a pinkish tone)
- White Vinegar: Apple cider vinegar or lemon juice
- Fresh Herbs: Dried flowers (like lavender) or even leaves from trees like oak or maple
- Oil: Any light oil like coconut or vegetable oil for a shine
Equipment
- Large Pot
- Nylon Stocking (long and thin)
Storage
Store dyed eggs in the fridge for up to one week. Keep them in an airtight container to prevent odors from absorbing. Do not freeze hard-boiled eggs, as the texture becomes rubbery and unpleasant. If you're not serving them right away, let them cool completely before refrigerating. For best color and freshness, avoid peeling until just before serving.
good food deserves a good board:

I'm obsessed with mine — real hardwood, made by hand, and just beautiful anyway you slice it. (ha!)
Psst, use code: MAJA at checkout for 15% off!
Top tips
- Use White Eggs – They absorb the natural dye better and make the botanical prints stand out more clearly.
- Pack the Onion Skins Tightly – The more skins you use, the deeper and richer the color.
- Tie the Stocking Snugly – This keeps the herbs pressed against the shell for crisp, defined patterns.
FAQs
Yes, this natural dyeing process is safe for kids, but make sure to supervise them when tying the stockings and handling hot water. It’s a fun, hands-on project, and they’ll love seeing the colors develop!
To get richer hues, simply add more onion skins and let the eggs soak in the dye longer. You can also leave them covered for an additional 5-10 minutes for a deeper tone.
While the onion skins lose some potency after the first use, you can reuse them for a lighter shade. Just keep in mind that the color may not be as vibrant as with the first batch.
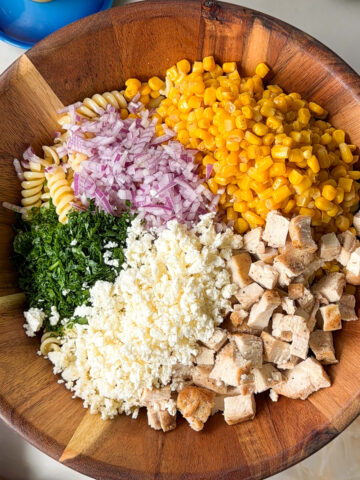
Easter Dinner Ideas


Dyeing Easter Eggs with Onion Skins (Natural Recipe)
Ingredients
Equipment
Method
- Wash your eggs and gently press a leaf or herb onto each one. A bit of water helps it stick.
- Carefully place each egg into a cut piece of stocking, pull it snug, and tie off the ends to keep the herb in place.
- Layer the onion skins into a large pot and nestle the wrapped eggs on top. Add enough water to fully cover the eggs, then stir in the vinegar.
- Bring to a boil, then simmer for 10 minutes. Remove from heat, cover, and let them steep in the dye for 30 more minutes.
- Once cooled slightly, unwrap the eggs, peel off the herbs, and rub each one with a little oil to bring out the color.
Notes
Tried this recipe?
Let us know how it was!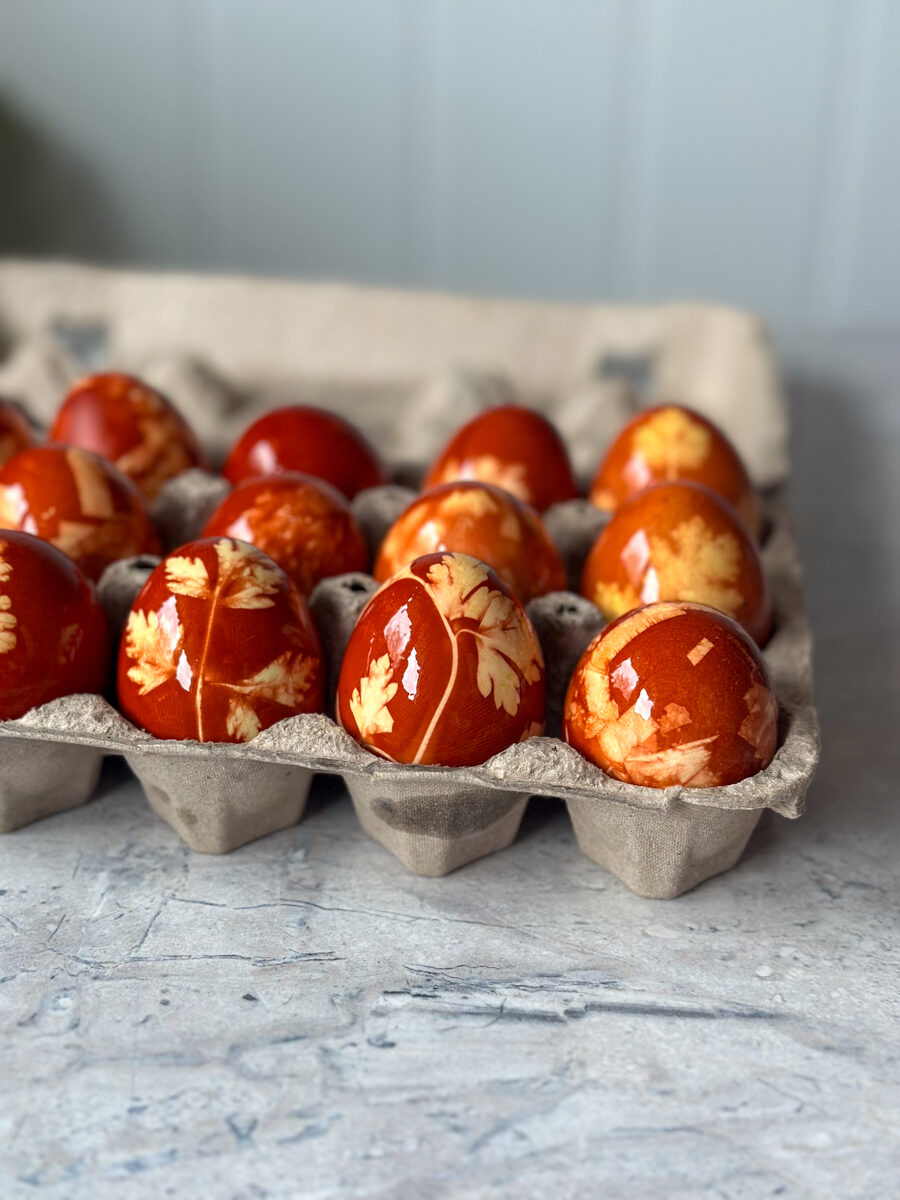
Food safety
- Don't leave food sitting out at room temperature for extended periods
- Never leave cooking food unattended
- Use oils with high smoking point to avoid harmful compounds
- Always have good ventilation when using a gas stove
See more guidelines at USDA.gov.


Meyzi says
Yes
Dora says
congratulations 🎉
It's been years that I wanted to try this method of colouring the eggs and your recipe inspired me
!
Thank you ☺️
Marilou says
How should I dye the eggs if I want to keep them for the next year's Easter celebration?
Sherry Lou says
Do the eggs get overcooked?